Stunt Jumps
Last Edited by bOnEs May 15, 2014 : 9 Comments : 120,853 Views
There are a total of 50 jumps in GTA V. You only need to complete 25 of these if you are going for 100%. For the completionists out there, you'll want to do all of them because there's a Trophy/Achievement for it. This guide should help you in that department.
A Few tips:
If you are ready then let's proceed. CLICK ON THE IMAGES for a better view.
 Pacific Bluffs
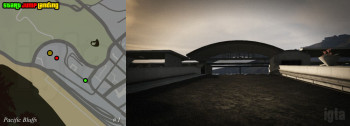
You will need to start this one a block to the Southeast. Look at the jump up close because you will have to navigate a small ramp, and then off the right side of the drop, missing the pillar in the middle. The driveway below is your target.
 Del Perro
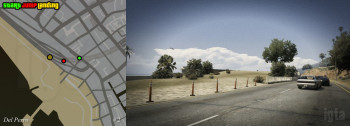
Looking at the entrance to the Del Perro Pier, go to the right down the hill. Blast thru the orange markers and hit the hill in front of you. Land on the southern portion of the highway below.
 Little Seoul
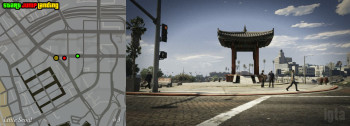
This jump is easy to spot and simple to make. Any vehicle will do.
 Little Seoul
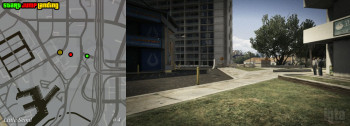
From the starting point you should see an opening in the concrete barrier in front of you. Follow that across the parking lot and towards the set of roadblock signs. Land on the street below.
 Little Seoul
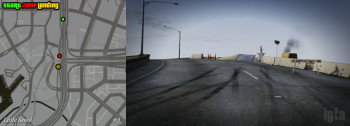
Getting to this spot on the Highway is the biggest challenge for this jump. Take the bend south, aiming for the higher overpass shortly down the road. Take the jump and land on the off-ramp below. You don't need a lot of speed for this one.
 Little Seoul
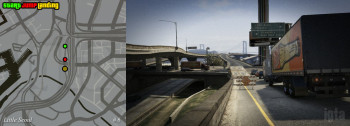
From the last jump continue down the off-ramp you landed on and you will see another jump. Try to land on the highway on-ramp across the street.
 Little Seoul
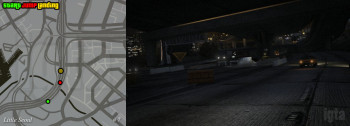
The hardest part is finding the entrance onto the highway. Start South and work your way up the Highway. Staying right, the road should dip down underneath the one above. On the left is a jump in the median. Watch out for the orange barriers, they will stop you in your tracks. Land in the opposite lane to complete the jump.
 Little Seoul
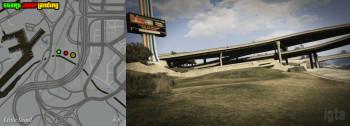
Just above the aquaducts on the north side you will find this little jump. You won't need a lot of speed so just make sure you clear the obstacle below.
 La Puerta
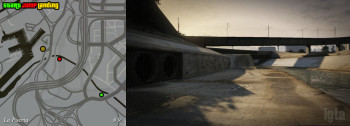
You will need speed for this jump. You have to clear not only the railroad, but two roads and land in the marina parking lot. Once you locate the jump from the screenshot, drive a ways back down the flood channel to where the burnt out vehicles are. Hit the jump at full speed aiming just slightly to the right.
 LS Intl Airport
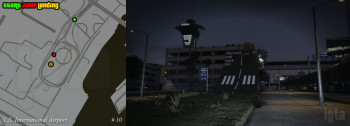
This one requires speed, tight handling, and good control in the air. Approaching from the off-ramp to the airport lower level, you will have to make a precise cut to the left to catch the ramp. Go up the left side to avoid the car, but not too far left that you miss the target. You have to safely land it on top of the parking garage, so this one will probably take a few tries.
 LS Intl Airport
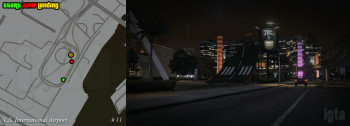
On the other side of the road there's another ramp just like the last jump, but this one requires a little less speed. Approach from the South and cut to the left as you approach the ramp. Angle it slightly left to catch the road you need to land on below.
 LS Intl Airport
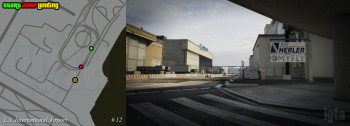
Turn around and head into oncoming traffic down the same road you used before you hit the last jump. You should see a ramp to the right of the gates leading onto the tarmac. Land on the road and you should pass it.
 Port of LS
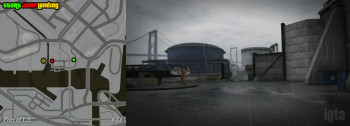
Once you're in position, the jump is right in front of you. Clear the water and land on the pavement across the way.
 Port of LS
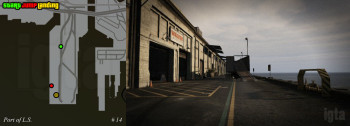
Turn right immediately after entering the docks. Then hang a left at the sea wall. A car with good acceleration is needed. Head south as fast as you can and hit the ramp on the right side. Land on the roof of the building to pass.
 Port of LS
You'll need a car with good acceleration. Head North and you'll see the jump after a row of traffic cones. Land on the roof to complete the jump.
 Port of LS
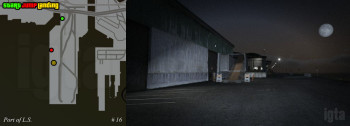
You are going to need speed for this jump. You should start this one far north the building in front of you to build up speed as you round the building to the right and head South. Hit the jump and land on the building directly across from the jump.
 Port of LS
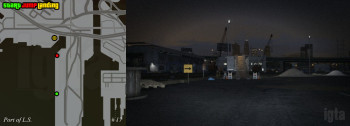
If you hit this one too fast you will crash into the building across the river. Get a good pace going from the South and clear the water to completing this jump.
 Port of LS
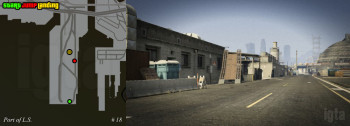
You don't need a lot of speed or you will over-shoot your target. Your goal is to land to the left of the giant tanks in front of the Security gate.
 Port of LS
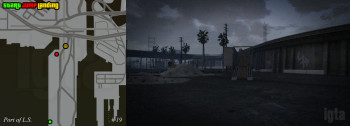
You will have to start at the Southern part of the port to build up enough speed to make the jump. You have to land on top of the overpass from the jump.
 Port of LS
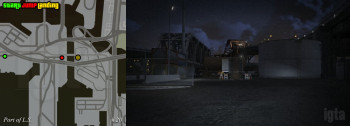
For this jump, try to hit the jump with a slight left projection to land in between the giant tanks. Fairly simple jump, just make sure you have enough speed to clear the water.
 Port of LS
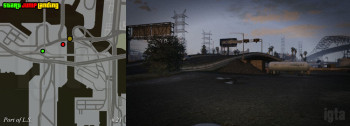
Hitting this mound can prove to be a challenge, plus the oncoming traffic and a pesky street light could also get in the way. The goal is to land a little ways down the street, almost past the river.
 Port of LS
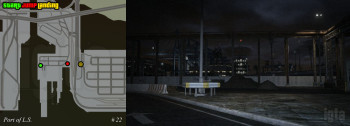
You should have enough of a track to get up to speed to make this jump. You have to shoot through the opening and clear the railroad and highway, landing near the parking lot across the way.
 Port of LS
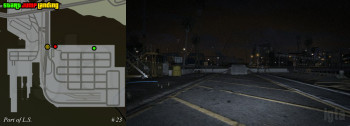
There should be plenty of room to make this jump in just about any vehicle. Clear the water and land on the highway.
 East Los Santos
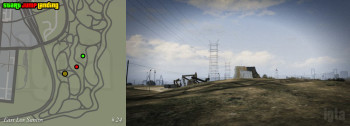
A rather simple jump. Clear the telephone poles and land before you hit the oil drill.
 South Los Santos
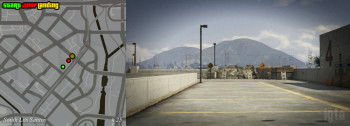
Make your way to the top of the parking garage. Land on the street right below the jump.
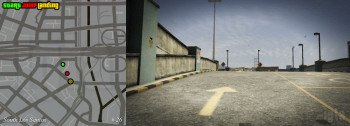 South Los Santos
Another jump from atop a parking garage. You will have to clear the building below the jump but that shouldn't be a problem.
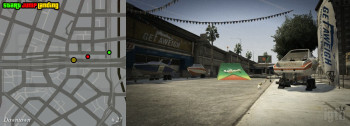 Downtown
You can't miss this ramp, it's bright green! From the starting location you will have to cross traffic and go through a gate. Land on the highway to complete the jump.
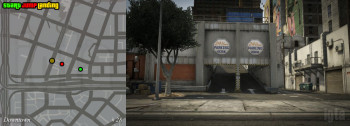 Downtown
Start from across the street of the parking garage. Once you enter the garage, the jump is straight ahead. Land on the street on the other side to complete the jump.
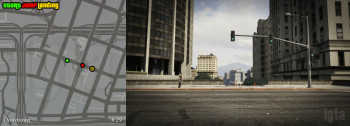 Downtown
This easy jump takes place on the roads above the location. You will have to drive off the opening in the barrier and land on the street below.
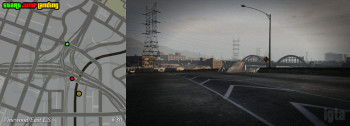 Vinwwood/East Los Santos
For this jump, you will have to navigate down an on-ramp on the highway and clear the water channel below. Decent speed is needed to clear the channel.
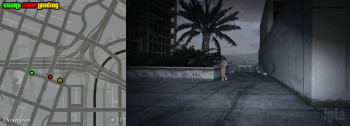 Downtown
Either having Franklin or a Bike is the best way to pass this one. The opening is very narrow, which leaves no room for error. From the starting point you will have to cross the intersection and make quick turns to reach the spot just to the right of the hospital. Landing on the sidewalk or road below will complete the jump.
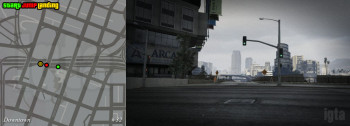 Downtown
This is one of the easier jumps on this list, you could make this one with just about any vehicle.
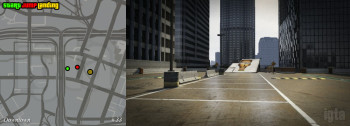 Downtown
This one is on top of the parking garage at this location. You will need something with good acceleration. There's a short runway before the downed billboard, and you have to clear a building below.
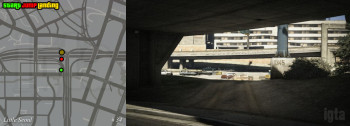 Little Seoul
Because of the hill near the jump, you shouldn't start back too far from it. All you need to do is reach the other side of the highway anyways so you shouldn't have much trouble with it.
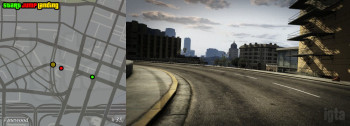 Vinewood
From the starting position, shoot across the intersection and thru the left path that leads upwards. There's a portion of the guardrail convienently missing so use that opening to reach the road beneath.
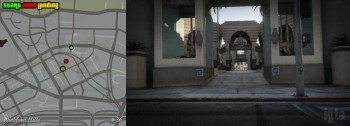 Rockford Hills
The starting position for this jump is only there for a guideline. The actual starting position will vary depending on the vehicle you are driving, it could take a few tries to get the timing right. If you come in too fast you will clip the top of the opening. Too slow and the jump won't trigger. I also recommend a bike to make the narrow landing.
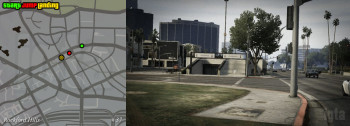 Rockford Hills
There's a few similar looking platforms for this particular jump. Go to the starting point so you're looking at the right one. Speed is not an issue because overshooting it will smack you right into the structure across the street. This is another one where you have to judge the speed of the vehicle you're using. It might take a few jumps to find the sweet spot.
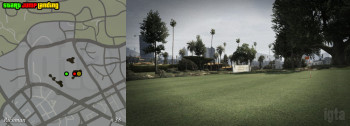 Richman
To make this one easier, just pay for a round of golf so you don't alert the authorities. Plus, it's easier to use the golf cart on this jump anyways. The starting point should be enough to clear the jump without hitting the obstruction above the landing spot.
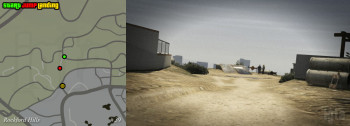 Vinewood Hills
Speed is needed for this one, although not exactly a requirement with the right vehicle. The good news is you're in a neighborhood full of nice cars. Your goal is to land in the intersection below so this one shouldn't be too hard to accomplish.
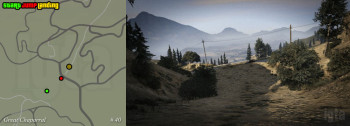 Great Chaparral
You'll be starting this one up a hill so just about any vehicle will work. Head down the path and when you hit the ramp, brace yourself for a long journey until touchdown. Keep the vehicle positioned for the landing and mission accomplished.
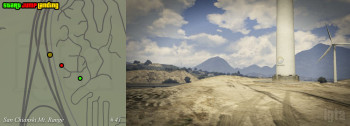 San Chianski Mt Range
In the heart of the wind farm lies this jump. It's pretty straight forward. Go to the starting location, hit the jump, land near the road below.
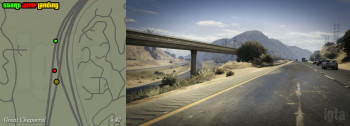 Great Chaparral
Staying to the right at the highway intersection, head towards the dirt mound. This one should be an easy one to find and complete.
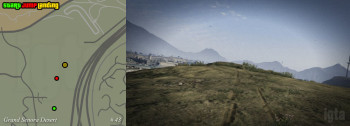 Grand Senora Desert
Take a look at the jump first before you try it, this one will land you inside the prison. A good offroad vehicle or a sports car works in this situation, but the starting point can be pushed further back for vehicles with slow acceleration. Once you locate the jump and the landing area (on the road next to first building you see), set the line and back up to the furthest edge of the farm.
QUICK SAVE!! Do this before the jump. Chances are you won't make the landing, or you didn't get the distance right because of the vehicle you're using. You'll have to start all over back at the Hospital if you failed because it's tricky to get out of the prison alive.
Once you've made the jump, you can either let the cops kill you, or try to make a dash for the front entrance. You will have to get out of your vehicle to run thru a few doors. Get to the parking lot, get a vehicle, and GO!
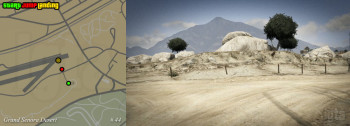 Grand Senora Desert
Go to the starting point. There should be a nice selection of off-road vehicles. The objective here is to jump over the giant rock and land on the runway.
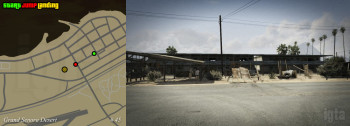 Grand Senora Desert
You're trying to jump over the motel and land over the pool on the other side. Any decent vehicle should work, like an off-road one, sedan, or a sports car. There's plenty of road to work with if you need more space.
 Mt Gordo
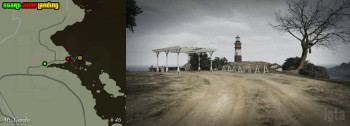
Save before attempting this jump because it will take a few tries. The objective is to land on the same level as the lighthouse. The only problem is the very tiny space provided. When lining up the jump, just before hitting the ramp, try to aim slightly right-center of the lighthouse.
 Paleto Bay
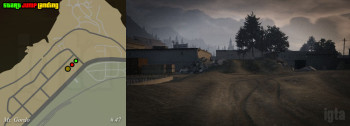
You could make this jump with any vehicle. This one of the easiest ones on the list, low speed is all you need.
 Paleto Bay
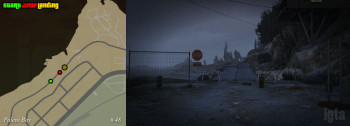
This one is pretty straight forward. Jump the gap between the two ends of the wooden bridge. Approach from the West.
 Raton Canyon
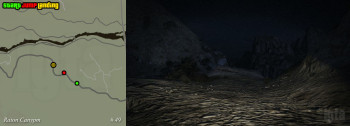
As you approach the jump from the starting point, keep in mind that you have to land on the road on the other side. Clearing the giant drop below is the main objective.
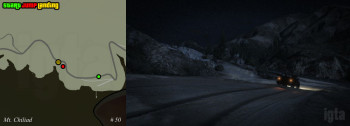 Mt Chiliad
Make good use of the road leading up to the jump. It's a small gap to clear, but you do need to jump it with some speed to make it to the other side.
...and that should do it. 50 jumps completed. There were a few challenging ones, I hope this guide helped.
A Few tips:
- Using Franklin makes these a lot easier because of his special ability to slow down time while driving.
- Use a bike when you can, but most of these can be completed using any vehicle with decent acceleration.
- Survey the jump before you try. It helps to see where the landing zone is, or the obstacles in the way.
- QUICK SAVE BEFORE A JUMP! Some of these take a few tries and some are harder to get back to if you miss.
If you are ready then let's proceed. CLICK ON THE IMAGES for a better view.
Jump 1
 Pacific Bluffs
You will need to start this one a block to the Southeast. Look at the jump up close because you will have to navigate a small ramp, and then off the right side of the drop, missing the pillar in the middle. The driveway below is your target.
Jump 2
 Del Perro
Looking at the entrance to the Del Perro Pier, go to the right down the hill. Blast thru the orange markers and hit the hill in front of you. Land on the southern portion of the highway below.
Jump 3
 Little Seoul
This jump is easy to spot and simple to make. Any vehicle will do.
Jump 4
 Little Seoul
From the starting point you should see an opening in the concrete barrier in front of you. Follow that across the parking lot and towards the set of roadblock signs. Land on the street below.
Jump 5
 Little Seoul
Getting to this spot on the Highway is the biggest challenge for this jump. Take the bend south, aiming for the higher overpass shortly down the road. Take the jump and land on the off-ramp below. You don't need a lot of speed for this one.
Jump 6
 Little Seoul
From the last jump continue down the off-ramp you landed on and you will see another jump. Try to land on the highway on-ramp across the street.
Jump 7
 Little Seoul
The hardest part is finding the entrance onto the highway. Start South and work your way up the Highway. Staying right, the road should dip down underneath the one above. On the left is a jump in the median. Watch out for the orange barriers, they will stop you in your tracks. Land in the opposite lane to complete the jump.
Jump 8
 Little Seoul
Just above the aquaducts on the north side you will find this little jump. You won't need a lot of speed so just make sure you clear the obstacle below.
Jump 9
 La Puerta
You will need speed for this jump. You have to clear not only the railroad, but two roads and land in the marina parking lot. Once you locate the jump from the screenshot, drive a ways back down the flood channel to where the burnt out vehicles are. Hit the jump at full speed aiming just slightly to the right.
Jump 10
 LS Intl Airport
This one requires speed, tight handling, and good control in the air. Approaching from the off-ramp to the airport lower level, you will have to make a precise cut to the left to catch the ramp. Go up the left side to avoid the car, but not too far left that you miss the target. You have to safely land it on top of the parking garage, so this one will probably take a few tries.
Jump 11
 LS Intl Airport
On the other side of the road there's another ramp just like the last jump, but this one requires a little less speed. Approach from the South and cut to the left as you approach the ramp. Angle it slightly left to catch the road you need to land on below.
Jump 12
 LS Intl Airport
Turn around and head into oncoming traffic down the same road you used before you hit the last jump. You should see a ramp to the right of the gates leading onto the tarmac. Land on the road and you should pass it.
Jump 13
 Port of LS
Once you're in position, the jump is right in front of you. Clear the water and land on the pavement across the way.
Jump 14
 Port of LS
Turn right immediately after entering the docks. Then hang a left at the sea wall. A car with good acceleration is needed. Head south as fast as you can and hit the ramp on the right side. Land on the roof of the building to pass.
Jump 15
 Port of LS
You'll need a car with good acceleration. Head North and you'll see the jump after a row of traffic cones. Land on the roof to complete the jump.
Jump 16
 Port of LS
You are going to need speed for this jump. You should start this one far north the building in front of you to build up speed as you round the building to the right and head South. Hit the jump and land on the building directly across from the jump.
Jump 17
 Port of LS
If you hit this one too fast you will crash into the building across the river. Get a good pace going from the South and clear the water to completing this jump.
Jump 18
 Port of LS
You don't need a lot of speed or you will over-shoot your target. Your goal is to land to the left of the giant tanks in front of the Security gate.
Jump 19
 Port of LS
You will have to start at the Southern part of the port to build up enough speed to make the jump. You have to land on top of the overpass from the jump.
Jump 20
 Port of LS
For this jump, try to hit the jump with a slight left projection to land in between the giant tanks. Fairly simple jump, just make sure you have enough speed to clear the water.
Jump 21
 Port of LS
Hitting this mound can prove to be a challenge, plus the oncoming traffic and a pesky street light could also get in the way. The goal is to land a little ways down the street, almost past the river.
Jump 22
 Port of LS
You should have enough of a track to get up to speed to make this jump. You have to shoot through the opening and clear the railroad and highway, landing near the parking lot across the way.
Jump 23
 Port of LS
There should be plenty of room to make this jump in just about any vehicle. Clear the water and land on the highway.
Jump 24
 East Los Santos
A rather simple jump. Clear the telephone poles and land before you hit the oil drill.
Jump 25
 South Los Santos
Make your way to the top of the parking garage. Land on the street right below the jump.
Jump 26
 South Los Santos
Another jump from atop a parking garage. You will have to clear the building below the jump but that shouldn't be a problem.
Jump 27
 Downtown
You can't miss this ramp, it's bright green! From the starting location you will have to cross traffic and go through a gate. Land on the highway to complete the jump.
Jump 28
 Downtown
Start from across the street of the parking garage. Once you enter the garage, the jump is straight ahead. Land on the street on the other side to complete the jump.
Jump 29
 Downtown
This easy jump takes place on the roads above the location. You will have to drive off the opening in the barrier and land on the street below.
Jump 30
 Vinwwood/East Los Santos
For this jump, you will have to navigate down an on-ramp on the highway and clear the water channel below. Decent speed is needed to clear the channel.
Jump 31
 Downtown
Either having Franklin or a Bike is the best way to pass this one. The opening is very narrow, which leaves no room for error. From the starting point you will have to cross the intersection and make quick turns to reach the spot just to the right of the hospital. Landing on the sidewalk or road below will complete the jump.
Jump 32
 Downtown
This is one of the easier jumps on this list, you could make this one with just about any vehicle.
Jump 33
 Downtown
This one is on top of the parking garage at this location. You will need something with good acceleration. There's a short runway before the downed billboard, and you have to clear a building below.
Jump 34
 Little Seoul
Because of the hill near the jump, you shouldn't start back too far from it. All you need to do is reach the other side of the highway anyways so you shouldn't have much trouble with it.
Jump 35
 Vinewood
From the starting position, shoot across the intersection and thru the left path that leads upwards. There's a portion of the guardrail convienently missing so use that opening to reach the road beneath.
Jump 36
 Rockford Hills
The starting position for this jump is only there for a guideline. The actual starting position will vary depending on the vehicle you are driving, it could take a few tries to get the timing right. If you come in too fast you will clip the top of the opening. Too slow and the jump won't trigger. I also recommend a bike to make the narrow landing.
Jump 37
 Rockford Hills
There's a few similar looking platforms for this particular jump. Go to the starting point so you're looking at the right one. Speed is not an issue because overshooting it will smack you right into the structure across the street. This is another one where you have to judge the speed of the vehicle you're using. It might take a few jumps to find the sweet spot.
Jump 38
 Richman
To make this one easier, just pay for a round of golf so you don't alert the authorities. Plus, it's easier to use the golf cart on this jump anyways. The starting point should be enough to clear the jump without hitting the obstruction above the landing spot.
Jump 39
 Vinewood Hills
Speed is needed for this one, although not exactly a requirement with the right vehicle. The good news is you're in a neighborhood full of nice cars. Your goal is to land in the intersection below so this one shouldn't be too hard to accomplish.
Jump 40
 Great Chaparral
You'll be starting this one up a hill so just about any vehicle will work. Head down the path and when you hit the ramp, brace yourself for a long journey until touchdown. Keep the vehicle positioned for the landing and mission accomplished.
Jump 41
 San Chianski Mt Range
In the heart of the wind farm lies this jump. It's pretty straight forward. Go to the starting location, hit the jump, land near the road below.
Jump 42
 Great Chaparral
Staying to the right at the highway intersection, head towards the dirt mound. This one should be an easy one to find and complete.
Jump 43
 Grand Senora Desert
Take a look at the jump first before you try it, this one will land you inside the prison. A good offroad vehicle or a sports car works in this situation, but the starting point can be pushed further back for vehicles with slow acceleration. Once you locate the jump and the landing area (on the road next to first building you see), set the line and back up to the furthest edge of the farm.
QUICK SAVE!! Do this before the jump. Chances are you won't make the landing, or you didn't get the distance right because of the vehicle you're using. You'll have to start all over back at the Hospital if you failed because it's tricky to get out of the prison alive.
Once you've made the jump, you can either let the cops kill you, or try to make a dash for the front entrance. You will have to get out of your vehicle to run thru a few doors. Get to the parking lot, get a vehicle, and GO!
Jump 44
 Grand Senora Desert
Go to the starting point. There should be a nice selection of off-road vehicles. The objective here is to jump over the giant rock and land on the runway.
Jump 45
 Grand Senora Desert
You're trying to jump over the motel and land over the pool on the other side. Any decent vehicle should work, like an off-road one, sedan, or a sports car. There's plenty of road to work with if you need more space.
Jump 46
 Mt Gordo
Save before attempting this jump because it will take a few tries. The objective is to land on the same level as the lighthouse. The only problem is the very tiny space provided. When lining up the jump, just before hitting the ramp, try to aim slightly right-center of the lighthouse.
Jump 47
 Paleto Bay
You could make this jump with any vehicle. This one of the easiest ones on the list, low speed is all you need.
Jump 48
 Paleto Bay
This one is pretty straight forward. Jump the gap between the two ends of the wooden bridge. Approach from the West.
Jump 49
 Raton Canyon
As you approach the jump from the starting point, keep in mind that you have to land on the road on the other side. Clearing the giant drop below is the main objective.
Jump 50
 Mt Chiliad
Make good use of the road leading up to the jump. It's a small gap to clear, but you do need to jump it with some speed to make it to the other side.
...and that should do it. 50 jumps completed. There were a few challenging ones, I hope this guide helped.
All content created by and property of iGTA5.com and must not be reproduced without express written permission. © 2011-2026 iGTA5.com
Comments (9)
- skierpage (Guest) July 04, 2014Best GTA V jump guide on the web, thanks. You could improve it by giving more accurate locations, e.g. Jump 30 is actually start Alta, jump Mirror Park/La Mesa, and landing La Mesa
- TreeFitty (Guest) April 26, 2014Changed all images to .jpg for easier loading. Also fixed the map for #28.
- B7DON (Guest) March 31, 2014Man sick!!!!!
- ironnthunder (Guest) March 20, 2014These maps might be accurate for story mode but not for online.
- Ginginho (Guest) October 16, 2013This guide iz the shiz!! chur bro
- Sameed GTA Legend (Guest) September 27, 2013Thanks , It'll make the game much more easier
- DuPz0r (Guest) September 26, 2013Nice one dude, this will make my life so much easier. ;)
- Godfather (Guest) September 26, 2013Fantastic guide bones. Awesome job.
- gtagrl (Guest) September 26, 2013Great work bOnEs! thanks a bunch, I'll be using this later.
Make A Comment
All comments are text only. Any BBCode or HTML entered will come out like it went in, so we suggest you enter ONLY TEXT.
Your comment will be posted as a Guest.

 Please Wait...